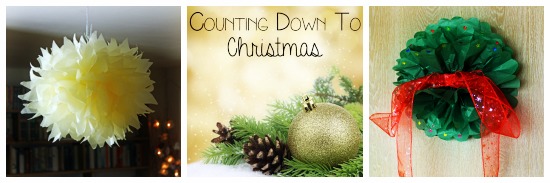
Thinly Spread, along with several other European children’s activities blogs, is taking part in the fabulous Countdown to Christmas organised by Cerys at Rainy Day Mum. Every Monday for the next four weeks will have a different theme which we will all be interpreting in our own way – this week’s theme is Christmas Paper Crafts.
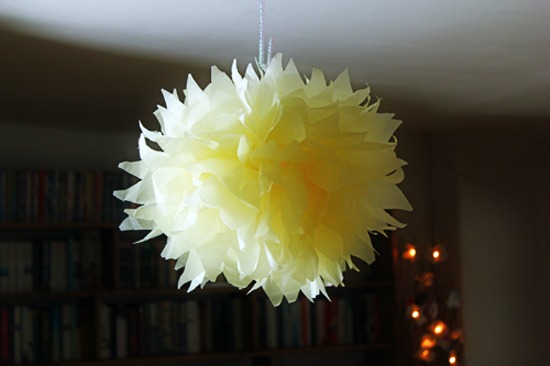
We’re all about the homemade decorations this year and we’re working our way through the paper box using up all the stuff we’ve accumulated over nearly 2 decades of family crafting. Last week it was recycled Christmas cards made into glittery hanging birds, today it’s paper pom poms! I love tissue paper pom pom making – the results are so gorgeous, big blousy, pillowy, generous decorations, and they cost just pence to make!
Older children find these easy and satisfying to make, I have made them with whole classes in the run up to Christmas and it’s a lovely therapeutic way to spend a Friday afternoon. Younger children may need some help, the tissue paper is delicate and can rip easily, folding can be a bit hit and miss but, once they’ve got it, the satisfaction on their faces when they produce something so beautiful is priceless. A neat pom pom is a satisfying thing but a few rips is not the end of the world.
How To Make Tissue Paper Pom Poms
You will need: Tissue paper, scissors, wire/strong thread/shiny pipe cleaners
Place 8 sheets of tissue one on top of another. Size doesn’t matter, the bigger the sheet, the bigger your pom pom!
Fold your paper, concertina style, backwards and forwards on itself like this:

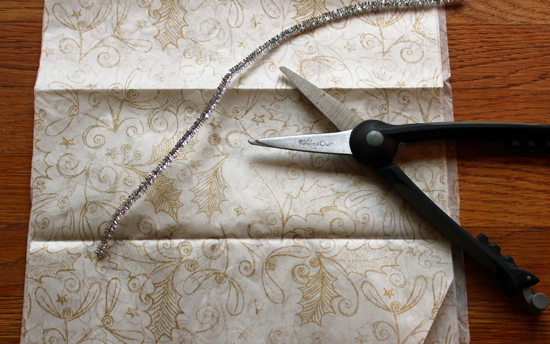
Find the centre of your folded tissue paper and tie it tightly with wire or strong thread. I’ve used a sparkly pipe cleaner here because it looks lovely at Christmas and provides a ready-made hanging hook!
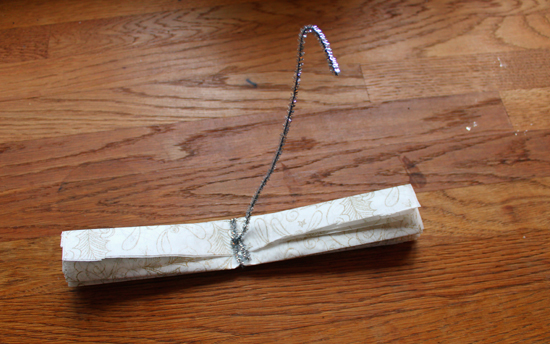
Cut both ends of your stack into a point if you want snowflakes like mine or rounded ends if you want flowers, you can experiment here with your own shapes.

Now for the tricky bit – taking one half at a time, fan your concertina out a bit. Gently separate the tissue paper layers and lift one up towards the middle at a time. Do this for four layers then turn your tissue paper over and do the other four so you have half a pom pom like this

Now do the other half in the same way

We loved the effect the patterned tissue paper made but I think I liked the plain paper even more

It looks gorgeous hanging from the beam in the sitting room and we think it would be amazing to make loads of them to hang from the stairwell!

Then my daughter had a brilliant idea – so brilliant I was tempted to pretend it was mine but she reads my blog so I wouldn’t get away with it! We made some more paper pom poms but this time we only used four sheets of tissue and we pulled them all up towards the middle from one side. This created half a pom pom which we could use as a table centre piece, stick to low ceilings where there is no room for hanging (most of ours) or – her brilliant idea – we could make wreaths to hang on internal doors! We added stickers and a big Christmas ribbon and we LOVE it!


I love these – I used to make them with my Nana. We used two (or more) different coloured sheets of paper sometimes too.
We’ve done that to make Spring flower pom poms Nickie – so effective! I might make a gold and silver one later now that you’ve mentioned it – just cos I can! 🙂
I made white tissue ones that I sprayed with silver paint last year. I love them so much.
I was thinking that glitter spray might work very nicely on the ones we just made Kelly!
What a lovely idea, and they look so pretty. I’d happily live with these all year round too.
Absolutely beautiful Chris
Oh I absolutely adore these and they look easy enough to make with the kids too! I’m so going to stock up on tissue paper when I’m next at the shops!
I just love making these – such beautiful decorations and easy to make. We made them in rainbow fairy colours for T’s birthday party this year, but now I feel the need to make some silver and gold ones for Christmas
These are so pretty – love the one with the fairy lights! I made a giant hungry caterpillar that hangs from my classroom ceiling using this technique 🙂
Oh how FAB! Have you got a photo? I’d love to see that! 🙂
These looks so effective!
I’ve never tried making these but they are so pretty. I think I’m going to have to make some little ones to hang from my mantelpiece 🙂
You have made these look so easy that even I will be able to make them with my zero artistic ability!
Paper pompoms are just so beautiful and tranquil looking. I never tire of looking at them