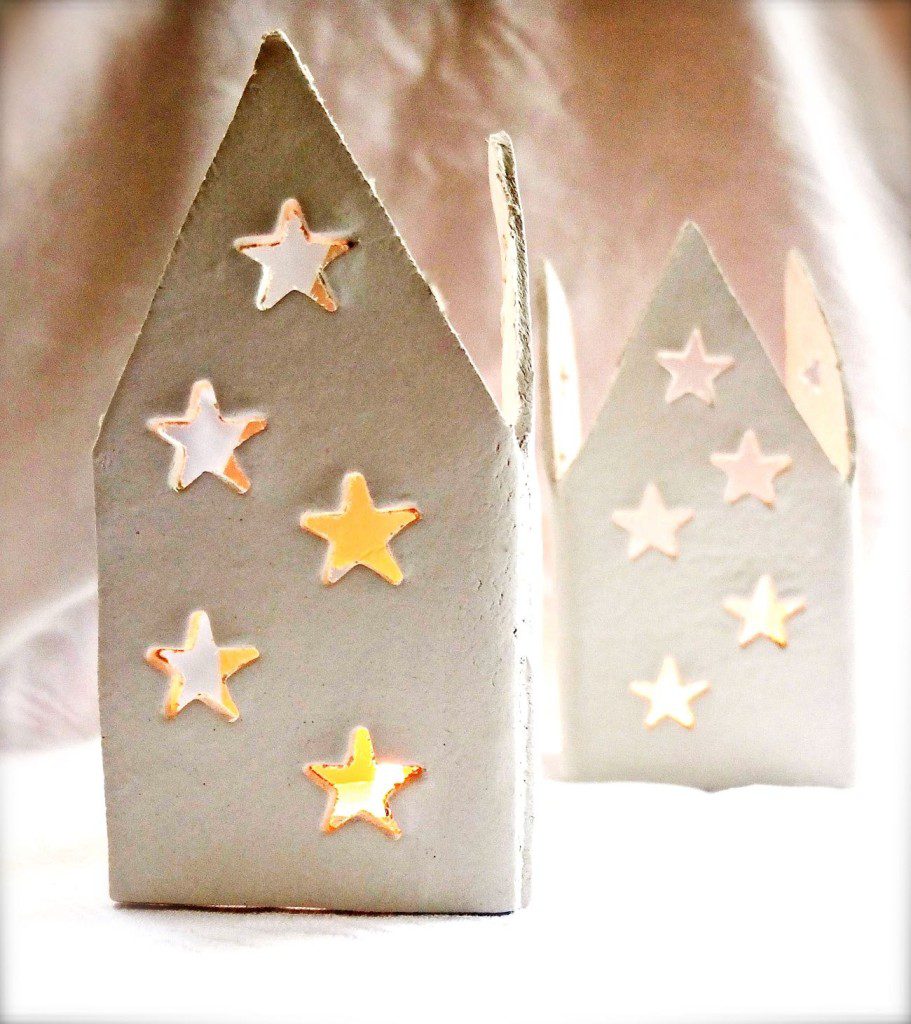
When I saw some beautiful DIY porcelain Christmas lights on A Beautiful Mess I knew I had to have a go at making something similar! I’ve always wanted a miniature light up Christmas village and I love making tea light lanterns so it seemed like a good plan to combine the two in one project.
This is an excellent project for older children and adults, if you are doing it with younger children you may find the results are a bit wonkier but Christmas is all about the quirky, wonky homemade decorations so that’s no bad thing!
You can also make them with white salt dough but it needs making before you can start and we were all about the speed on this particular day!
To Make Your Own Christmas Village you will need:
- White air dry clay
- A4 card stock
- Non stick baking parchment
- Small shaped cookie/icing cutters
- Rolling pin
- Small knife
- A small bowl of water
- Tea light candles
Begin by making a template with your card stock. For the large houses (Template below) I divided a piece of A4 card equally into thirds (card laid landscape), I then measured into thirds again and drew lines from the top third diagonally to the top of the card to form the house peaks. Cut out the peaks and fold the card along the vertical lines then flatten it out again.
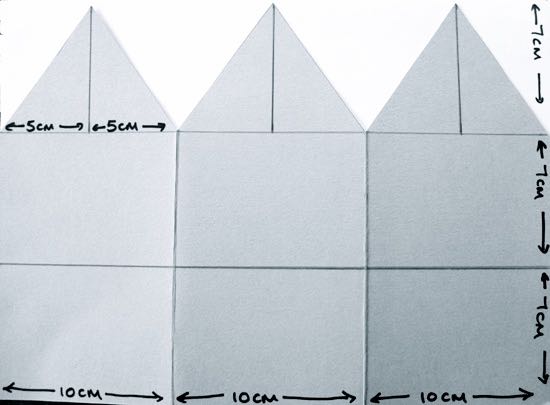
For the smaller houses (Template below)) I laid my A4 card portrait and measured thirds along the bottom giving me a house 7cm (just under 2 inches) wide. I measured 16cm (6½ inches) up the side, divided it in half and did the same as with template 1 for the peaks.

Place your baking parchment on top of your template and roll your clay out as evenly as you can until it is about ¼cm thick. Having the template underneath means that you can see how big your clay needs to be.
Place your template on top of the clay (put the side which isn’t covered in pen onto the clay and avoid my first disaster – houses look better white than covered in pen smudges!) Cut the clay out with your small knife using the template as a guide.
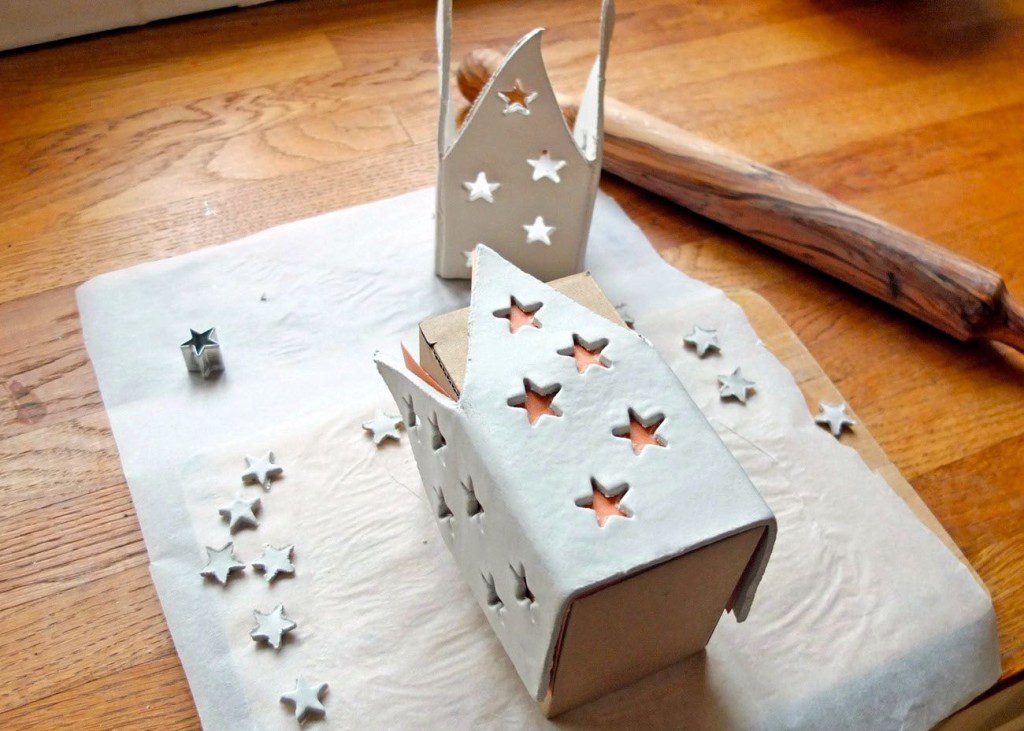
Use your cutter to stamp out starry windows in your houses. Fold your clay around the template. It should stand securely with the card as support but I made doubly sure by putting mine over a box.
Leave overnight to dry, remove the card and box and leave to dry again. This can take two or three days depending on the warmth of your house. Don’t rush the drying process or your clay will crack.
Making these lights got a bit addictive and I decided I needed to make cylinders too! This time I measured a toilet roll tube and made a flat template the same size.
I used a mini Christmas tree cutter instead of the star and joined the clay at the back to make a complete cylinder. To join the clay score both ends with your knife and dampen them a little with cold water, press them together and smooth over with a damp finger.

Leave to dry as for the houses.

I love how the houses seem to go on forever when they are reflected in the window.


Oh this takes me back somewhere, something my mum had, haven’t seen it for years. I think I know someone who would love to help me make these! I couldn’t stop clicking Chris, all your posts are so tempting!
You have me grinning from ear to ear Penny, thank you! I do hope you make them and that you enjoy it as much as we did! x
Hello Chris, they are so beautiful, I would like to make some, too :). But are they suitable for candles? Aren’t they dangerous because of temperature? Thank you.
Hi Laurentia, we made ours large enough for the candle to be well away from the sides but I would recommend using LED flameless candles to avoid any risk. I hope that helps! Chris x
These are so gorgeous – I can’t wait to have a go with the twins (ours will definitely be a wonkier version!). I’ve featured you over on my #CreateMakeShare round up – thanks so much for joining in x
Oh thank you so much! I’m over the moon!